Chat 17
Correct answers to the 4 picture quiz from Mick Dughan, Pat Robotham, Don Eades, Walter & Kath Partington, Kath & Don Sales
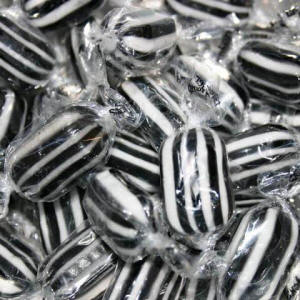 The answer is:- Liverpool
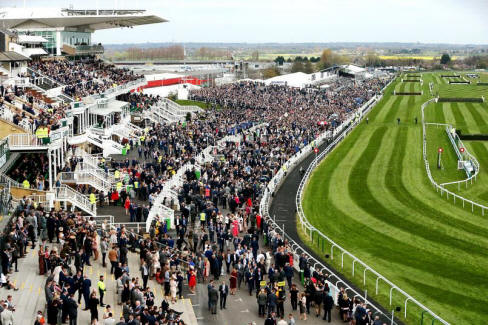
The pictures all show connection to Liverpool. Top left = Everton mints Top right = The Beatles Bottom left = Aintree Racecourse Bottom right = Slave trade |
 |
 |
.jpg) |
The piston quiz will run for a few days with an extra clue each day. What is this piston from? The simple clue today is:- It is not from a bike engine, it is from a car. Not many guesses so far. Eddy
 Answers by email to:
edgrew@virginmedia.com
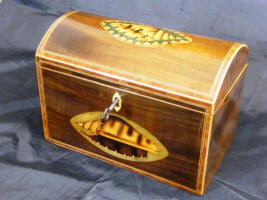
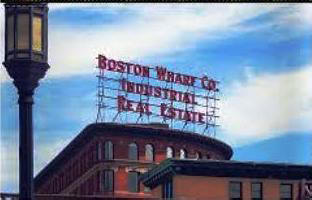
This issues picture quiz is another 4 picture quiz from John Grew. What is the link between these pictures? Send your answer and why you think each picture relates to the link to: edgrew@virginmedia.com


A computer tip:- If you want to magnify this webpage to make something easier to see, hold the "Ctrl" key down and keep pressing the "+" key until you have the magnification you want. To reverse the process hold the "Ctrl" key down and keep pressing the "-" key Should work on most computers.
Not sure if it works if you're using a Mac, maybe try "Cmd" and "+" or "-". Eddy.
Here is a nice piece from Ken Palmer who maybe has more of a good reason than most to get back on the road with this bike when the Covid19 restrictions are lifted. Eddy.
Hope you and everyone else is OK and
surviving the lockdown.
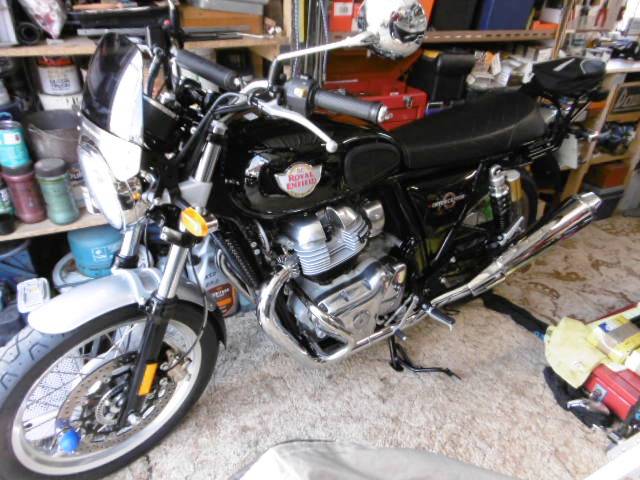
Just been sorting out some stuff and I came across the April issue
of Vintage & Classic Motorcycle magazine. To my surprise, on the
front cover is shown the new Royal Enfield 650cc Interceptor with
orange tank. Even though I own a BSA C15 and A50 motorcycle some
people are saying that I have turned to the dark side, due to me
taking a delivery of a brand new Interceptor (with black tank) from
Smalley Cross Motorcycles on 4th March this year. Although the
orange looks great we, that is my wife, Elaine and I decided to go
for the black due to both my other bikes being red. Unfortunately, I
only managed to do 73 miles on this beauty before lockdown started.
Why did I turn to the dark side? Because, since my youth I have only
ever owned BSA and Royal Enfield Motorcycles and as Elaine and I
want to start travelling further afield and there are no brand new
BSAs yet this seemed like a good idea. Looks like we will have to
wait awhile due to the current situation!
Needless to say, I will not need to enter the raffle but I know that
the lucky winner will love it, just like I love mine. The only thing
they will need to remember is that the rear brake and gear change
have been swapped over, as is the case for modern bikes. Yes, I have
changed down instead of braking.
Regards, Ken Palmer
Matchless G11 600cc Twin Lucas E3L Dynamo 12v Conversion Part 4
The assembled dynamo was then left on the
bench until I received my order of spare cork gaskets and a tube of
Wellseal. This was used by the AMC factory and was recommended by
Don Sales. Don told me to soak the gasket in Wellseal, leave it a
while and soak it again before installing the dynamo. See Pic 6a
AJS and Matchless twins are notorious for oil leaks at the
dynamo/timing case joint. The dynamo is pulled up against the timing
case by a single 3/16” stud and nut which is located offset on the
dynamo drive end bearing housing. Once pulled up the dynamo body is
secured to the engine crankcases by a circumferential clamp band.
Over time and mileage the cork gasket hardens and probably shrinks,
potential movement at the joint interface through vibration and
thermal effects together with a significant amount of oil flung
around by the timing gears oil weeps leading to leaks are pretty
much inevitable. Additional care needs to be taken when installing
the dynamo on a Matchless or AJS twin.
When I have previously installed the dynamo on the G11, with the
dynamo end cover removed, I have crudely made use of a long clamp to
apply some limited additional compression of the joint against the
timing case to reduce the load on the draw stud to reduce the risk
of stripping the 3/16” thread. The clamp bears on the end of the
dynamo commutators bearing housing, see pic 6b, and the engine
timing case cover. The additional clamping force may also help
balance the offset loading from the dynamo draw stud. The difficulty
with using this external clamp is keeping the clamp retained on the
complex smooth shape of the timing case. All I have previously been
able to do was manually hold the clamp in place which severely
limits the clamp force applied, but I still found it beneficial to
help compress the cork gasket.
This time I decided to attempt to improve on the application of my external clamp by making a shaped piece of wood to better locate on the surface of the timing case and also provide a location hole to accommodate the clamp pad. After some sawing, shaving, chiseling, filing, sanding and repeatedly offering up the shaped packer to the timing case I managed to obtain a clamp face close to parallel to the end of the dynamo. See pic 6c. Although much improved the clamp and shaped wooden packer still migrated and slipped off the timing case if left without manual retention. This was solved by the application of a ratchet tie down strap restraining the clamp in the longitudinal direction and a thin section of wood slipped between the top of the clamp and an engine barrel cooling fin. See pic 6d. With both restraints in place I could increase the clamp force further initially on the external clamp which allowed the dynamo draw fastener to be tightened without excessive torque being applied to the fastener via the open ended spanner. The additional force sufficiently compressed the Wellseal soaked cork gasket. I could then nip up the clamp band which retains the dynamo in place against both the engine crankcase and the timing inner case. In addition, thanks to my homemade wooden packer and crude restraints, I could leave the external clamp in place. See pic 6e. Following Don Sale’s advice, I left the assembly over night to allow the cork gasket to compress. Next day when I returned to the bike I noticed excess Wellseal, which had been squeezed out of the joint and compressed cork gasket had dribbled down the timing case, see pic 6f and onto the drip tray, fingers crossed it was a good sign. With the external clamp still in place I slackened off the dynamo clamp band. I then tightened the external clamp further and at the same time tightened the dynamo draw fastener.
The joint pulled compressing the cork gasket
a bit further. See pic 6g. Satisfied I had sufficiently compressed
the cork gasket as best as I could achieve without stripping the
threads of the 3/16” draw fastener.
With the dynamo installed, using a test wire connected to both (F)ield
and (D)ynamo with a meter connected between the test wire and earth
I started the engine. Through the smokey exhaust smoke (The bike had
not been run since November and there was inevitably some excess oil
in the crankcase) I was pleased to see a positive healthy 12+ volts
showing on the meter at just above engine tickover. With just a few
more revs I saw circa 14 volts. Great the dynamo works!
Next day, after making a new bracket to fit into the toolbox, I
installed the new regulator, see pic 6h and replaced the 6v bulbs
for 12v filament bulbs.
I wheeled the bike outside the garage
connected jump leads to the BMW 12 volt battery, taking care to
ensure I connected it for positive earth, started the engine, stared
at the ammeter and it was showing a healthy charge of 3 – 4 amps.
Switched on the headlight, revved the engine a bit and the ammeter
needle swung over to the positive. Not only was the dynamo
delivering a good 12 volt output but the new V-Reg-2a voltage
regulator was delivering a decent charge under load using filament
bulbs. I felt pleased with my efforts.
Like everybody else, I now have to wait for the pandemic to be
declared over and I can ride the G11 to bike meetings and ride outs
to really know for sure that my rebuilt dynamo is performing well
and is reliable.
My only disappointment is that I did not spend the time to fit the
new regulator whilst the 6v dynamo was still working to ascertain
whether the previous 6v regulator limited the charge from the
dynamo, making night time riding more challenging. I am of the
opinion it probably was
Writing this has probably taken me as much time as to do the job. I
hope this have given you, the reader, an insight into some of the
challenges and opportunities I encountered overhauling my dynamo.
Would I overhaul another dynamo myself again? Yes I would, providing
I can obtain quality spare components. It is a good feeling when
assembled and when tested, it delivers a decent voltage. If asked, I
would encourage others to repair their own dynamo, either to keep it
6 volt or upgrade it to 12 volt especially if having to replace a
defective armature. All the problems I encountered were easily
overcome with a bit of thinking about together with some sound
advice and useful tips from others. In my opinion it is beneficial
to share knowledge and experience to keep these old machines
functional and on the road. All part of section club life.
Thanks for reading. John Renwick
Dana Neal sent this:-
Thank you for the Chats Ed, they are much appreciated.
Another little racing story, this one involves you!
Mark Walker is an excellent bike builder and a skillful racer, but
sometimes has ideas that might be regarded as "left of field".
He had constructed a useful little Royal Enfield 250 Crusader, we
dyno tested it after each and everyone of Mark's "modifications",
but to my mind, it never realised it's potential.
He also built a 350 unit construction Enfield too, which to be
truthful never gave Steve Linsdell any sleepless nights. We went to
a VMCC race day at Mallory with both bikes scrutineered both without
incident.
As I had feared, the 350 was terrible, underpowered and suffered
from some of Mark's lightweight engineering designing. (Basically it
fell to bits during practice...).
After a few minutes discussion with me and Outhwaite, we came up
with a daring plan, one that was "technically" against the regs, but
not really cheating as such, well, we didn't think it was.
So, we cut the race plates from the 350...
Mark raced the 250 and wasn't disgraced coming in the first three
(not easy with people as talented as Mervyn in the race).
Mark came back in, we pulled the bike under the ropes, cable tied
the 350 race plates onto the 250, pulled it back into the collecting
area for 350 machines, quick bit of re-fueling, quick wipe of Mark's
visor and he was out again. He rode his guts out and finished in the
first six!
Excellent, bit of time left, so we cut the 350 plates back off, got
the bike ready for the 250 race.
Mark went out again, nice result again, but as before we had to get
the bike ready for the 350 race in a hurry.
We pulled the little machine under the ropes, Mark had a quick swig
of water, Outhwaite sprayed and cleaned Mark's visor, Outhwaite and
I refilled the little bike and was just cable tying the 350 plates
(complete with scrutineering stickers from the other bike of course)
when a tall shadow fell upon us. It was Mr. Grew and he was less
than pleased...
"We know what you are doing, we all know that it is against the regs
and you shouldn't be doing it you, you, you, well anyway, we are
turning a blind eye just this once, but if anyone complains you're
all for the high jump and we know nothing about it!"
With that, Eddy stalked off trying to look officious but struggling
not to laugh.
The happy ending?
Yeah, course we got away with it, Eddy never snitched, no-one else
noticed and the little giant killers humbled some 350 machines.
Just in the spirit of Historic Racing, or blatant cheating?
You must decide for yourselves.
Best Regards, Dan
Racing Remembered
The great story above reminded me of another incident at Mallory but
first a prologue. There were rumours circulating in the vintage
racing paddock that some riders had engines bigger than their class
limit. To try an keep everyone happy, we as a committee
decided we would measure a few engines in the hope that people who
were gaining an "unfair advantage" would take their "big" engines
out of their machine or at least enter it in the appropriate
capacity class. Eddy
I always seemed to get stuck with the
unpopular jobs. The engine measurer joined my list of other
unpopular jobs such noise meter operator or telling someone they
couldn't ride because non-eligible parts fitted, e.g. wrong brake,
some other part that wasn't allowed in that class, or it was too
loud.
You could almost see people shrinking back into their vans and tents
like the parting of the waves as I walked down the paddock.
They hoped I wasn't coming to see them with "bad news".����
(Speaking of noise metering that reminds me of another good
story, I'll save that for another time.) At this
particular meeting at Cadwell Park we picked a few race numbers to
be measured. We called out the numbers on the Tannoy and when
the riders came down we explained what we were going to do. It
wasn't popular but most agreed without too much of an arhument.
Mervyn Stratford, was one of the riders selected. Mervyn was
regular winner on his 250cc Rudge and so a
good target for the "he must have an oversize engine" gossips.
Mervyn agreed to take the head off his Rudge and be measured after
his last race of the day. When I measured it and did the
sums it was indeed a 250, just as one would expect from someone as
professional as Mervyn. I can't remember now how many we
measured but it was notable that one sidecar competitor hadn't come
to see us despite numerous Tannoy announcements. Eventually he
did come to the paddock office and said that we didn't need to
measure his engine as it as the outfit he and his passenger were
using had an oversize engine. I don't think we took any
further action at the time but his card was definitely marked.
Anyway back to the Mallory Park story.
Like most race meetings Mallory paddock is a busy place. There is virtually a constant stream of similarly clad riders on a variety of bikes making their way to the start area, people and bikes all over the place. Despite most of the real action being on the track organisers and marshals try to keep a weather eye on what is happening in the paddock. There has to be an assumption by the officials that all the competitors will, more or less play by the rules and just get on with the job. However, if your card has been marked someone might just take a little bit more interest in what you are doing. It was noted that one of the two sidecar competitors we mention in the prologue also had a solo entry on, I think a Greeves 250. All is well and the meeting was running quite well and we are well into the meeting when the classes get their second race. As a certain Greeves with a familiar pair of leathers aboard was making its way to the start holding area it was noticed that the leathers didn't seem to fit the rider as well as they did for the first race. (Can you guess where this is going?)
The rider of the Greeves was stopped and asked to take his crash helmet off. Surprise surprise, the person revealed was the not the one of the sidecar pair that had raced in the first 250 race, it was the other one who didn't have a solo entry! The pair of them were told not to bother entering for any more vintage race meetings.
You may ask did it really matter? Well, apart from obviously being against the rules, anything bad that happens at a meeting reflects on the organisers. Imagine what the outcome would have been if a rider involved in an accident was found not have even been entered. He would not have been insured and it would have looked really bad in the ACU stewards report or Coroner's Court if there had been a fatality.
On the whole I really enjoyed my involvement over the years with motorcycle racing but we can certainly do without people like that pair mentioned above. I'll sort some more Racing Remembered stories for another time. Eddy.
We showed you some pictures and a video of Tony Harris' home built NHV creation in Chat 16. I asked Tony to give us a few more details and he kindly supplied a few facts below and a couple of pictures showing how the frame was lengthened. Eddy,
The VNH is std 350 Ariel bore and stroke at
72 x 85 times 2 which makes it about 692cc.
The motor has run before and I think, I gave a talk about it some
years ago when it was in the Norton frame.
In this set up I used it for a couple of years with a few little
issues. One was over oiling on start up. I wanted it to be as
much Ariel as possible and eventually I acquired an Ariel chassis.
Last year I finally stripped the motor to
address the oil problem. The flywheels were very close to the
inside of the cases so I split the flywheels and reduced the OD of
the wheels. It also sent a lot of oil up the rear cylinder so I made
steel plates to go above the flywheels attached to the inside of the
crankcases so just the con rods protruded through these and up the
bore. I also made additional scrapers for the flywheels, it
now has two sets. I also fitted new timing gears with 3
keyways for better cam timing adjustment.
The engine being a V twin was a bit too long to fit into the
standard Ariel frame so I had to add about 2" to the frame. The bike
now uses a Burman gear box and Ariel primary drive. I have had a
short ride on it and it steers fine and will make a very nice bike
in its pessent form. I am sure there will still be a bit of fettling
to do but we will have to wait until we are let out. At least
the smoking appears to have stopped.
Tony
The engine Tony made that is now in the lengthened Ariel frame used Ariel iron barrels, Ariel heads. It has a single carburetor mounted in the "V" of the cylinders like Harley- Davidson. This meant that the rear head had to have the inlet port turned into an exhaust port and vice versa. A lot of welding and machining is involved to do this. You might ask might ask why not just turn the head back to front. Not so easy as it puts the pushrods on the wrong (drive) side of the engine.���� Eddy.
Tony has also made another "V" twin. This second engine uses Tony's own aluminium barrels and Norton cylinder heads and a carburetor for each cylinder. Maybe Tony will give us some details about that one another time.����
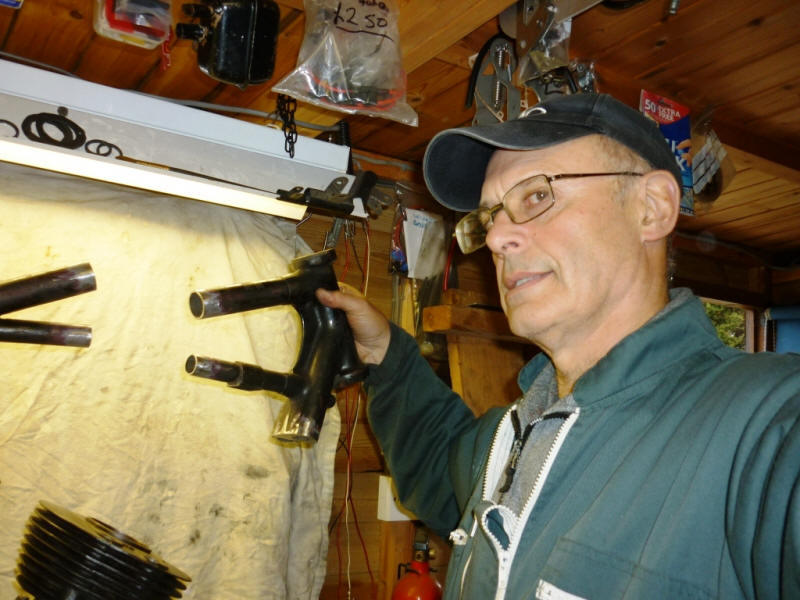
The frame with the top tubes cut and the headstock tubes
extended ready to weld back in.
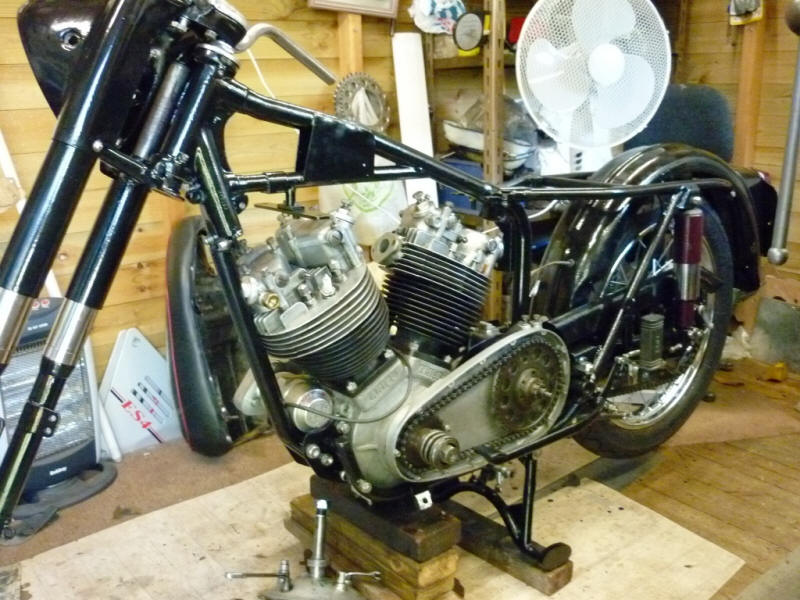
The extended frame with the extra pieces of tube welded in.
Next up, an entertaining item from Pat Davy.
Eddy
GET YOUR HAIR CUT!
PART 1
“Get your hair cut” and “you will never have a motorcycle as long as
you live in this house” were about the only two things I can
remember my father saying to me when I was a youth. The first I
could cope with but the second caused me much disquiet as we shall
see in the tale of my introduction into motorcycling unfolds.
Both my mother and father came from large families and not one of my
many uncles, aunts or cousins had a motorcycle. I was a lone voice
in a wilderness of motorcycle ignorance, so from where did my
interest develop? I think from the same source as John Goodall
namely aero modelling. My father was a printer on a national
newspaper in Fleet Street and possessed no mechanical knowledge or
aptitude, the only tool he owned was a claw hammer, which I still
have, but he could not knock a nail in without bending it at 90
degrees. On the other hand, although not mechanical my mother was
extremely resourceful at making things with her hands. I like to
think all my mechanical leanings came from my mother's genes.
I started off aero modelling with solid, non-flying models, I could
not afford anything more ambitious on 9d a week pocket money (that's
9d in old money, when there were 240 pence to the pound). With the
supplement of a paper round I was able to graduate to rubber powered
flying models and eventually powered flight. A paper round really
needed a bicycle to make life bearable. I had no bike but at the end
of my road there was some waste land we kids called “The Dump”. It
was aptly named as it happens as all sorts of rubbish could be found
there including discarded broken bicycles and parts. All the
treasure was quickly pounced upon by the local kids as Cycle
Speedway was the latest craze and eventually a very presentable
track was built on the dump, all done by the kids. So, I got myself
a bicycle built and painted two shades of blue. Oxford and
Cambridge, some hope!
This could only be accomplished by borrowing spanners from wherever
and started a motley tool kit from charitable donations. The seeds
were gradually being sown and starting to germinate on my mechanical
future.
It was, looking back, the little single cylinder air cooled model
aero engines that triggered the 'petrol head' gene inside me and, to
a larger degree shaped the rest of my life.
Before I get into the motorcycle hub of this tale allow me to relate
an unusual aspect of aero modelling that is little known about. I
had joined the local aero modelling club, namely The Epsom &
District Model Flying Club and using my new found mobility of a
bicycle, half roadster half speedway, would cycle to their flying
ground on Epsom Downs of a Sunday to enjoy the sport. With little
activity during the winter months the EDMFC devised an exciting club
night activity, that of R.T.P. Jetex racing. Round the Pole Jetex
racing required an 18” high light angle iron pylon with a ball race
supported spindle at its summit to be screwed to the middle of the
wooden floor of the Scout hut we used. To the spindle a high tensile
fine wire was attached and to the other end of the wire a docking
latch for the Jetex model. For the non-modellers I should explain
that that the JETEX MOTOR was a re-chargeable rocket motor that in
its initial form (JETEX 50) was only about 5/8” diameter and 7/8”
long. It required a strict loading procedure, a bit like muzzle
loading firearms and a stock of consumables, fuel capsules, gauzes
and fuse wire.
The procedure was as follows:- all occupants of the room stood on
chairs placed against the walls, the Time Keeper stood above a piece
of white paper pinned to the floor, a vacant chair was available for
'The Pilot' to hop onto once the launch was accomplished. The door
was bolted so nobody could walk in. When the Timekeeper was
satisfied that all was correct he gave the Pilot the signal to
launch. The fuse was lit, the Pilot waiting for the full thrust to
develop and when fizzing furiously the craft was launched. Things
could then get quite animated. The Pilot with the agility of Jack
Rabbit had to gain the sanctuary of the chair before the first lap.
Smoke and acrid fumes started to fill the room and through the haze
and confusion the Timekeeper started to time ten laps. As soon as
the JETEX cut out and the craft landed there was a stampede for the
door and fresh air.
This was all very fine if things went as described above but as
designs got more ambitious and development reduced size and frontal
area in the pursuit of more speed things got decidedly hectic. It
was found that a rather expensive brand of cigar came in a thin
aluminium tube with a screw cap, the blind end was a half sphere or
dome, not the perfect aerodynamic shape but still pretty good but
the bonus was that a JETEX would just squeeze down the tube. Initial
prototypes resorted to the universal aero modellers adhesive 'Britfix'
Balsa Cement to attach air frame appendages such as wings and tail
to the aluminium tube. Not good. In fact, it could be very funny and
definitely potentially dangerous. All was fine for about three laps
then the heat from the 'JETEX' got to the Britfix cement which
combined with increasing 'g' force released the tethered wing from
the rest of the craft which then went into free flight, boy o'boy,
did that sharpen ones reflexes. If this sport were to be conducted
today HSE would require it to be held in a PADDED CELL which would
also serve as home to the participants.
Back to sanity for PART 2.
He is lucky his was wife was close enough to swat the bee off with her spade.
John Goodall has sent me a series of very
interesting model engine. Eddy.
Engine 1.
The engine is made in USA and is called the Erriksssen MCC engine,
the MCC standing for Migrating Combustion Chamber. It claims to be a
full expansion engine which is what interested me and reputedly has
a very quiet exhaust noise. It has two working cylinders at each end
of a sliding piston working within two variable capacity chambers.
The text explains the combustion cycle. It runs on a mixture of
methanol and oil like most two stroke model engines and has a
carburettor that regulates engine speed. They were made about ten
year ago and is has taken me a long time to obtain this one as not
many were made due to the high cost brought about through its
complexity.
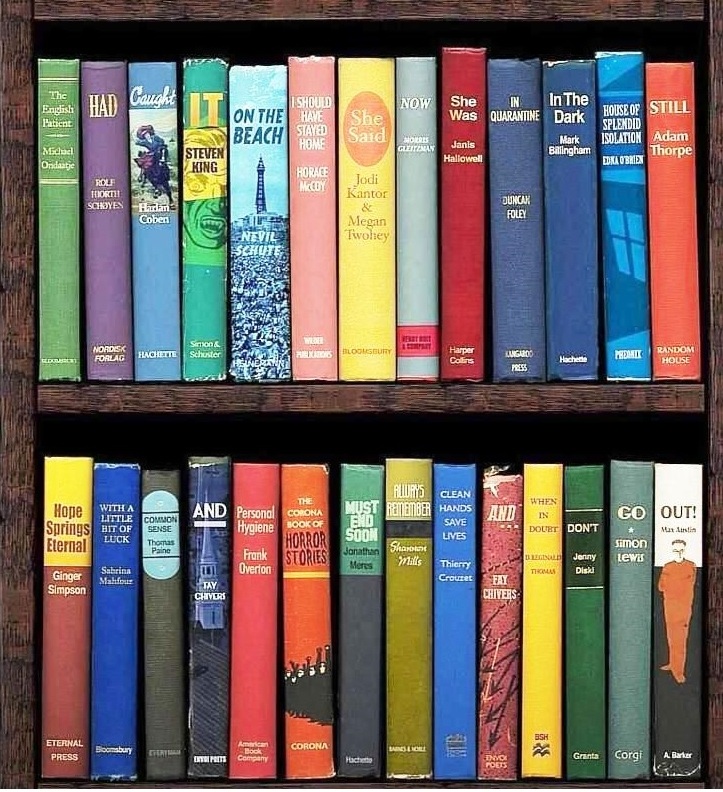
Ray Duffin sent this picture.

Thanks to all that have sent in items for the chats. It is very much appreciated. Keep sending. Eddy

